Showing posts with label home improvement. Show all posts

Saturday, March 24, 2012

Progress in my bedroom

Last week, I got lots of work done thanks to a Saturday burst of energy. This week, not so much, but there is still progress, and as the title of the blog indicates, I am all about baby steps, small improvements, and progress.

The one room in the house that has never been clean since we moved in 18 months ago is my bedroom. It is getting closer and closer. Here are some of the things that I got done this week:

  • I sorted through the green accordion file with legal, medical, and tax archives, as well as the file crate from the closet and sent an enormous stack of papers to the recycle bin, as well as shredding another enormous stack (which filled a huge garbage bag). The consolidated files fit in the covered bin I purchased and slides nicely under my bed. 
  • I cleaned the full-length mirror, as well as my bathroom mirror, the bathtub, and the mirror in the half-bath.
  • I cleaned off our dresser! This is a feat in itself, as it has been the repository of many papers, random stacks of picture frames, full and empty shoe boxes, and anything else that was homeless.
  • I cleared most of the window seat. It still has my 2 mismatched sock bins and my small remaining homeless/action item pile, but look at all that empty space!
  • I vacuumed the bedroom floor. This is momentous because it means that the carpet space was visible!

Here is the dresser before (sorry about the dark photo):

And here is the dresser after:

Here is the window seat area before:

Here is the window seat after:

There is still work to be done, but things are looking so much better. I can BREATHE in my room. It is starting to feel much more restful there. 

I am linking up to simplemom.net's Project Simplify. Check it out for all kinds of inspiring before and after shots!

Wednesday, March 21, 2012

Progress in the bedroom, playroom, and the pantry

Last weekend, the fit was upon me! I spent most of Saturday in a burst of frenetic energy, sorting and re-organizing the pantry, the kids' bedrooms, the playroom, and my bathroom (which is not yet finished, so no pictures).

First, the playroom. I have no before picture, but imagine books all over the floor, blocks, paper airplanes, bits of paper - a general mess. Every few months I have purchased another black Itso bin at Target - they are $9.99 (unless you find them on sale) and they fit perfectly into the Expedit shelves. Now I have 3 and I would like to get 1 more. These were extremely useful for getting stuff out of the kids' rooms and into the playroom. I have one bin for things that go (cars, airplanes, rockets), one bin for blocks, and one for animals (plush toys, electronic hamsters, dinosaurs).


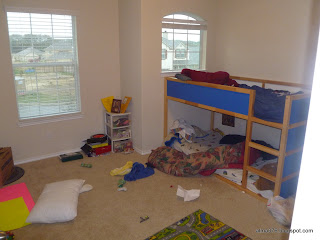
Here is my son's room, before and after:


We did a lot of sorting, purging, and consolidating. We moved the rug out to the playroom. He has kept his room clean for 3 days, which is wonderful. The best part was that we worked on it together.

We also worked on his closet - again, no before picture, but imagine clutter and toys and books and papers. Such an improvement!


Last, but not least, the pantry. It is half laundry room, half pantry, and is our entrance from the garage, so it is a high traffic area. The laundry side just needed a little attention. Most of what I did was sorting and consolidating pantry things. We had a lot of half empty #10 cans of various foods, and I was able to put a lot of that into glass jars. Now I can actually see what I am looking for instead of having to read 5 labels and shuffle cans around. I also moved things around to be more intuitive, so breakfast cereal and oatmeal are reachable by my children.

Here is the laundry side, before:

And after, just tidied up:


The pantry side, before (see all those #10 cans, spread all over the place?):

After (top shelf is practically empty! Jars on the second shelf, like things together, breakfast foods within reach. Ahhh! So much better):

Before  (unsorted laundry spilling all over the floor, can't open the door, can't really walk through easily):

After (sorted laundry in bins, 4 #10 cans of onions holding placemats - do not ask me why I have 4 #10 cans of dried onions):

Tonight I went to the grocery store and bought some more pantry staples, so that top shelf is no longer empty: another box of oatmeal, two cases of applesauce, some bbq sauce, salsa... I was having contractions all evening (just warm-ups), and I kept mentally patting myself on the back for making sure there was food in the house, just in case labor started. Wishful thinking on my part:)

I am still working on several areas. My bedroom and bathroom are getting a little cleaner every day - babysteps! - and so far, I've managed to keep the pantry and the playroom clean upstairs, thanks to my kids helping out.

What room would you like to be more organized? Do you work best in a fit of energy or taking babysteps? Check out simplemom.net's Project Simplify for organizing ideas and motivation. 

Sunday, February 12, 2012

More kitchen progress: the paper files

You may remember the small transformation that one corner of my kitchen underwent last year, from looking like this:


To this:


I really liked it, but what I have learned since then is that I need a place to put all the papers that come out of backpacks and the mailbox. Sometimes it's a bill to be paid, sometimes it just needs to get filed with the tax papers, sometimes it requires a decision to be made or some other future action. My papers were taking over this little corner and spreading across the bar that separates the kitchen from the living room. Not pretty.

I thought a small vertical file would be nice, so this afternoon, I took an old shirt box, made a few cuts, covered it with some cute paper, glued it together, and TA-DAH! Now my papers have a resting place when they come in, and I didn't even have to spend a dime. I have three folders in there for now: To File, Take Action, and Bills to Pay. I will have to put a reminder on my calendar to go through the files once a week, so I don't miss anything. 


It took a lot longer than I expected, but I am pleased. It isn't perfect, but it's an improvement, and isn't that what life's about? Small steps in the right direction and continual progress.

What small steps have you taken recently to make your home a little more organized or a little more liveable?

Wednesday, November 2, 2011

Progress in the kitchen

Way back in April, I wrote a post called babysteps in one corner of the kitchen. I've made some more progress and wanted to document it.

Here is my beautiful corner today. Way in the back on the hall wall is our wedding photo from 11 years ago. It makes me happy. I found the clock yesterday at Home Goods. It says Cafe de Paris. I can't afford a plane ticket, but I can afford a clock. The red rectangle of wood was a Christmas gift from my mom several years ago. It has our family name in creamy capitol letters and across the middle in black script, it says Families are forever.


You might be wondering what it used to look like? Here is the original before photo from the old post:

Saturday, April 16, 2011

The traveling bookshelf OR try, try again

This is not a glamorous, amazing before-and-after. It is a small success story of saving myself some effort and filling a need by shopping my house.

Our story begins in the hall closet, where an old bookshelf held shoes. It was a fine set-up, but the shelf pushed the vacuum over so that it was a little tricky to get it out of the closet. There was a footstool and an ironing board in there, too.

Tuesday, April 12, 2011

Babysteps in one corner of the kitchen

I'd like to have a perfectly clean, nicely decorated home. Like every other person out there, I allocate my time to a variety of projects and people, plus I tend to spend too much time planning and too little time DOING. Today, I'm acknowledging the small steps, in an effort to encourage more doing, for it is "by small and simple things that great things are brought to pass."  Here is one kitchen corner, improved:


Sunday, April 10, 2011

I'm a fan

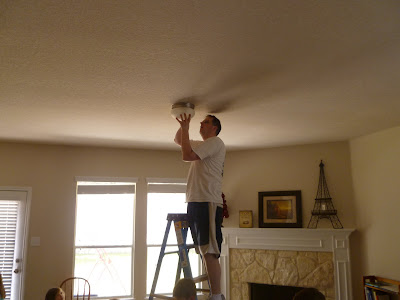
Last weekend, we (meaning my husband and his handy brother) put up our first ceiling fan! I was not here to document the process and learn how to do it, but my husband snapped a few photos of the process. Because the ceiling was already blocked for a fan, it only took an hour and a half instead of the 4 hours the instructions said it would take. Woohoo!

This is the before shot. Pay no attention to the random objects on the mantle. That is another project for another day and another post.


Friday, March 18, 2011

My favorite room of the house


This is my garage after I finished epoxy-painting the floor. The first few weeks after I finished the floor, my husband and I would just walk in to the garage and stand there, smiling. You can see that I didn't do a perfect job, but it was my first big project, and I was sooooo proud. Just ignore that clothesline; we needed it for a while because our dryer was out of order.


As beautiful as the garage is above, it was even MORE beautiful with some edging. Our amazing friend/realtor and his wife brought over their nail gun, caulking, and spent an entire afternoon and evening on this project. Sadly, I didn't take pictures until we got the water softener in, so here's a peek at the corner.


It is surprisingly easy to epoxy paint a garage floor, although it does require careful reading of instructions. The men of and around the house (my husband, his brother and father) took care of the preliminary cleaning/degreasing/etching, and I did the fun part - the painting and the flake sprinkling.

One thing that is a little tricky is that once you mix the epoxy, you are under the gun to get the painting done quickly . The longer you go, the drier the epoxy gets, and after a certain time frame, it's just too sticky/tacky to work with. The instructions make that abundantly clear.

We love the way the floor looks, and we love knowing that mud and oil leaks won't stain our garage.

If you're thinking about doing this, check out some of the products out there. We used Quikrete and were really pleased.


Here I am working on the edge - how do you like my work clothes? My husband eventually persuaded me to switch to a roller, which was much faster. Thanks, Schnookiepookums!

Here's the garage after I painted the concrete dividers and the edges.

A shot from inside the house at the halfway point. You can see the colored flakes
if you look closely.

I'm linking up:

giveawaysHookingupwithHoH